


Impress guests when you serve this Estonian Kringle, braided cinnamon bread, at your next gathering. This European dessert is simple to make and sure to fill your kitchen with the warm and comforting flavors of cinnamon.
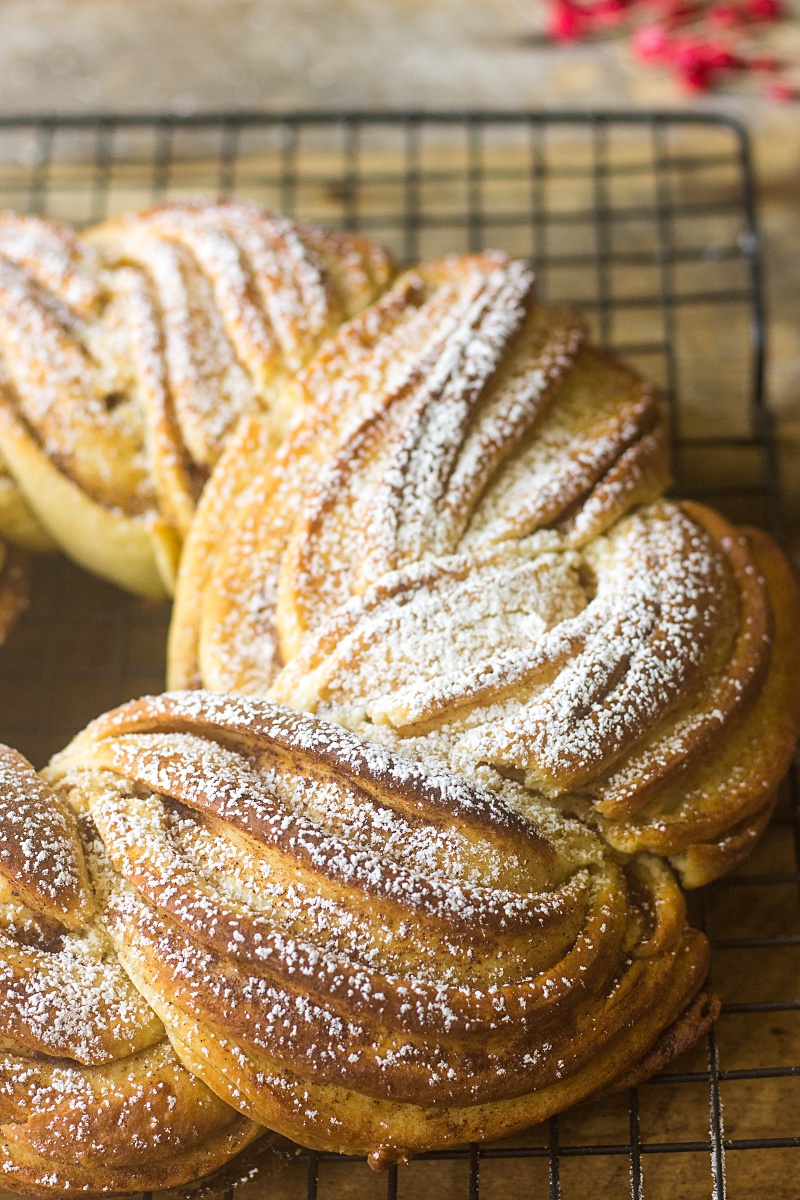
Estonian Kringle: A European Dessert
When you think cinnamon, what is the first thing that comes to your mind? I bet it’s fall baking, Thanksgiving, and Christmas. But let me tell you something, friends, there are some beautiful cinnamon desserts out there that deserve to be baked all year round. This Estonian Kringle is one of them.
Kringle is a traditional Estonian cinnamon braided bread. It somewhat reminds me of a Czech Trdelnik that I made last year where cinnamon was also the dominant flavor.
If you were to ask me, I would certainly tell you that European desserts are hands down the most delicious and creative that I’ve ever tried. The more recipes I try, the more I am amazed by how simple ingredients get transformed into masterpieces. My favorite thing is that most of the time, those masterpieces can easily be made at home without special skills or equipment.
 is one beautiful dessert that you can easily make at home. No special equipment required!")
Why Estonian Kringle?
What’s interesting is that other European countries like Denmark, Sweden, and Germany have their own version of Kringle. I found Estonian Kringle to be the most interesting one because of its beautiful braided shape. Don’t be intimidated though, it’s not difficult to make at all. I’ll walk you through all the steps.
Perfect for special occasions, breakfast, or Sunday brunch!
Kringle is often served at weddings, birthdays, and other special occasions, but I won’t blame you if you decide to make it just because. Kringle can also be enjoyed with a cup of morning tea or coffee and it’s perfect for a Sunday brunch. I like to smear it with a thin layer of butter for extra creaminess.
 is one beautiful dessert that you can easily make at home. No special equipment required!")
This Kringle is very versatile. Aside from the traditional cinnamon and butter filling, you can use poppy seeds, cardamon, or even chocolate. If you can’t handle the whole thing at once, don’t be afraid to freeze it. Just place it in a zipper bag or tightly wrap in plastic and you can freeze it for a few months.
Ingredients
- 1/2 cup + 1 tbsp milk, heated to 120ºF
- 2 cups flour
- 1 sachet (7 grams) active dry yeast
- 6 tbsp sugar
- 2 tbsp butter, melted
- 1 egg
- powdered sugar for dusting
- 5 tbsp sugar
- 5 tbsp butter, softened
- 1 1/5 tsp cinnamon powder
Instructions
- In a medium bowl, combine milk, 2 tablespoons of flour, 2 tablespoons sugar, and active dry yeast. Leave it for 20-30 minutes to activate and increase in size.
- In a large bowl, combine the remaining sifted flour, melted butter, 4 tablespoons of sugar, egg, and yeast mixture. Knead the dough until no longer sticky. You might need to add a bit more flour. Shape the dough into a ball and place it in a lightly greased bowl. Cover the bowl with a towel and place it in a warm place until the dough doubles in size, about 60-90 minutes.
- Preheat the oven to 375ºF.
- In a small bowl combine all ingredients for the filling.
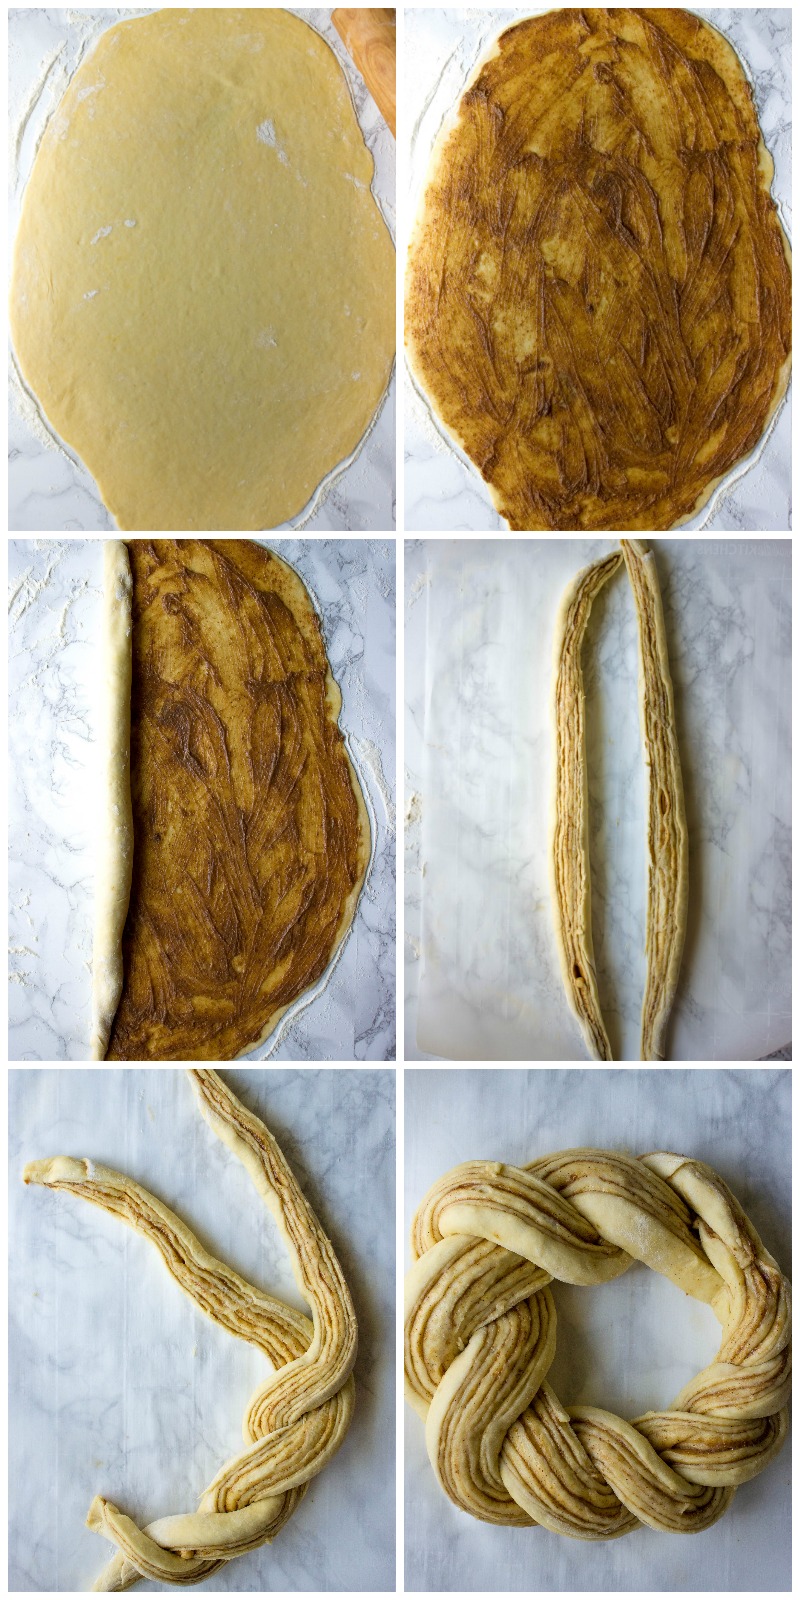
- Lightly flour the working surface and thinly roll out the dough into a rectangular shape.
- Spread the filling on top of the dough and roll it up into a log. Transfer the log to a piece parchment paper.
- Using a sharp knife, cut the log lengthwise.Turn the log with the exposed side up and start twisting the two halves together. Pinch the ends together and give the log a round shape.
- Transfer parchment paper with Kringle to a baking sheet, cover with a plastic wrap, and let it rise for 20 minutes.
- Remove plastic wrap and bake for 20-22 minutes until top of Kringle is golden brown.
- Dust Kringle with powdered sugar.
- Enjoy!
Notes
Home Chef Tip: Instead of a butter cinnamon filling, you can also use poppy seed, chocolate chips, chopped nuts, or dried fruits.

 is one beautiful dessert that you can easily make at home. No special equipment required!")
We hope you love this Estonian Kringle recipe from SoFabFood Home Chef, Iryna from Lavender and Macarons, as much as we do. If you love this indulgent recipe, stop by our Dessert Section to find more like it. For daily recipe inspiration, subscribe to our newsletter, like us on Facebook, and follow us on Pinterest. Enjoy!

Comments